I was always fascinated by Mozaic, the arrangement of random sized pieces in mortar. Goa is famous for Chinese Mozaic and I was wondering who will teach it. Luckily, Ms. Kanika Singh a Mozaic artist from Gurgaon, conducted a 2 (half) day workshop, and off I went and registered myself.
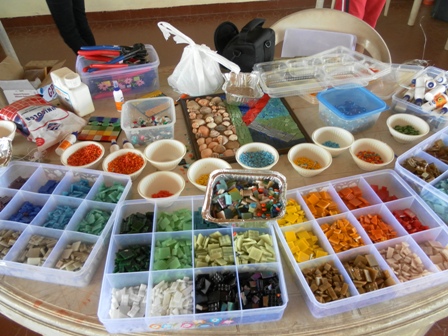
Glass tiles of different colours
She provided all the materials, ie. a frame of 9" square with hardboard backing, a mirror of 4" square, glass mirror pieces of various colours, coloured glass beads, etc. The glass mozaic pieces have a translucent quality and lovely gloss to them. On the right side, they have a smooth finish, and on the back, there are groves for better grip when glued. They are about 2.5mm thick. One can use any other decorative pieces like, sea shells, pieces of ornaments, metal pieces, small stones etc. to give variety to the composition.
In the 2 days, we have to make a decorative mirror frame with mozaic around the mirror.

Round wheel tile nipper (Tile cutter)
We could use the materials as they are, or if we need smaller sizes or different shapes, we could cut them up and use. The cutter (as shown above) has circular blades and you get a more or less even edge. One needs a little bit of practice to get the diagonal lines and curved lines properly.
The mozaic work is done in two stages, the first stage consists of Tiling. I made a tentative design, deciding the position of mirror, the colour scheme, and sizes of glass pieces and a general pattern to follow. It would have been better if we did draw the whole thing on paper and arranged the pieces on it, finalised it , and then transfer the whole thing on to the frame. Anyway, I had a mental picture of what I wanted. Firstly, I stuck the mirror on the hardboard base with Fevicol. Then one by one, stuck all the glass pieces as per my pattern, leaving a fine gap of 1 - 1.5 mm between any two pieces. I also filled a few gaps with glass / ceramic beads to add interest to the design.
Ms. Singh recommends Fevicol SH for gluing the mirror and the glass pieces. We let them dry overnight.
 Cement for Grouting
  Hardner
Stage two is done on the second day. It consists of grouting, ie. filling the gaps between the glass pieces and finishing. There several shades of cement for grouting. Different coloured grouting gives different looks to the same colour scheme of glass mozaic. I chose copper shade cement. Used the hardner and some water and mixed the cement thoroughly. A soft and stiff consistency should be achieved.
Left it aside for a few minutes to become tight. Took a small lump of grout and pressed it between the gaps in the design. Slowly filled all the gaps in the frame with grout. Either with the fingers or with the help of spatula, the grout had to be pressed, making sure there were no air pockets. Next step was to wipe off excess grout from the mozaic. Polishing the glass pieces and beads with fine cotton or muslin, until they shone, took some time. Once it is done properly, the whole thing looks lovely and it is a very satisfying experience.

My final Mirror Mozaic Piece
I am thrilled at the finished product. Infinite number of designs are possible. I aim to explore a few at least.


No comments:
Post a Comment